
This article is a complete, beginner-friendly guide for Ghost CMS users on how to manually update their customized themes without losing design settings or code changes. The article walks readers through backing up their theme, using tools like WinMerge, FileMerge, and Beyond Compare to compare and merge theme files, and re-uploading the updated theme correctly. It also provides troubleshooting tips, best practices like using Code Injection for minor changes, and key takeaways to make the update process smooth and stress-free.
If you're running a Ghost blog, chances are you've customized your theme to match your requirements. You've invested time tweaking some layouts, fonts and even added custom functionalities. Naturally, you're worried about losing all your hard work when updating your Ghost theme.
This step-by-step guide will help you manually update your customized Ghost theme safely without losing any of your custom changes.
Important Steps Before You Update Your Ghost Theme
Before you jump into updating your theme, it's important to cover a few key steps first so that you don't run after me if anything goes wrong.
Backup Your Current Theme
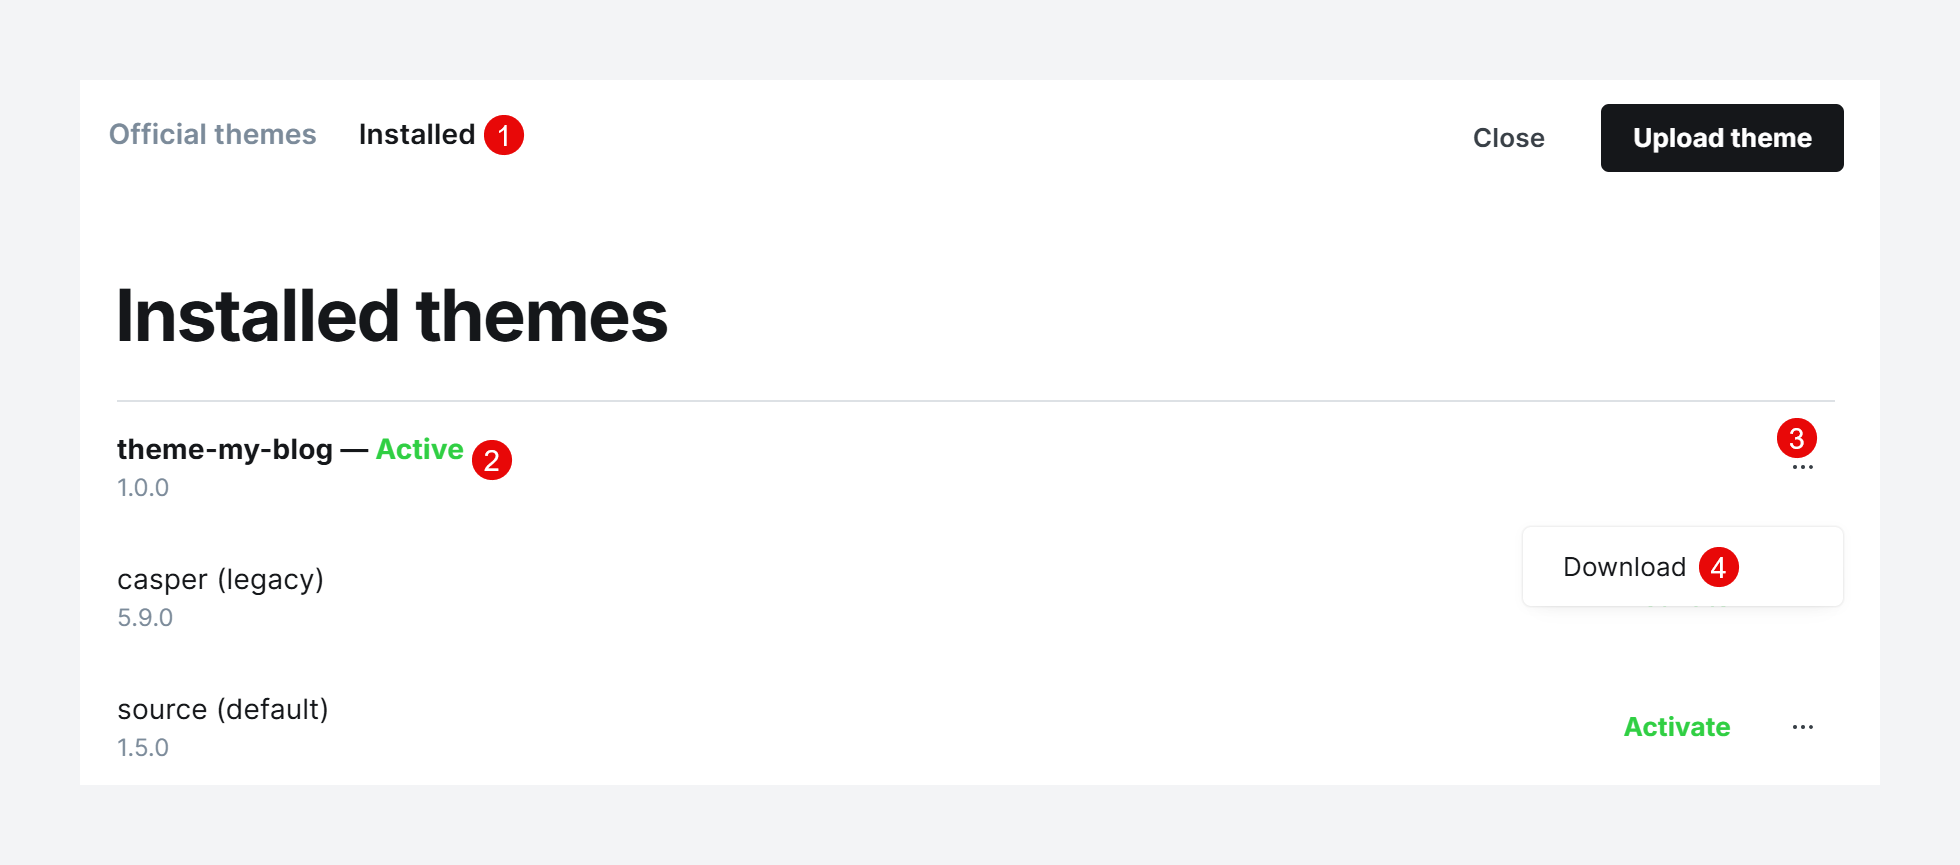
- Always, always, always download a backup of your existing theme from Ghost Admin (Settings → Theme (under Site) → Change theme → Open Installed tab on top-left corner → Download your active theme by clicking on the 3-dots). Keep this safe as your fallback.
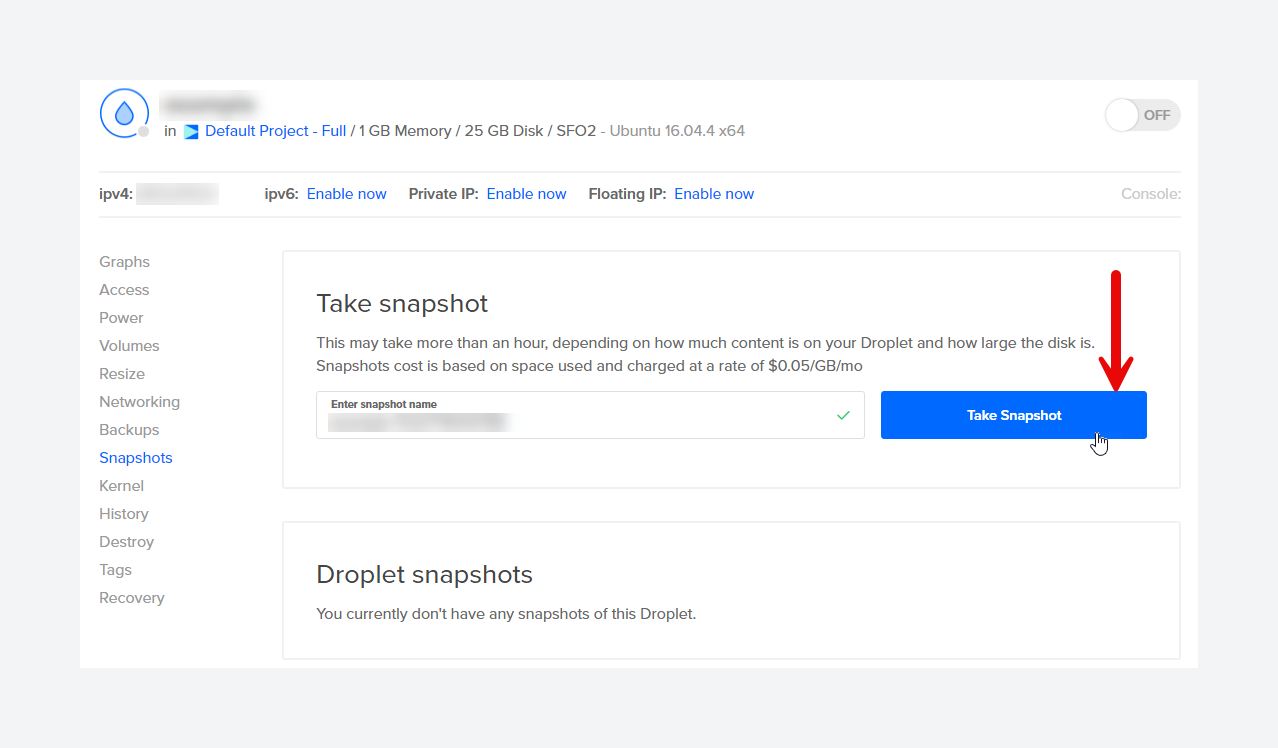
- In addition to that, for self-hosted, you can also take a complete server level backup or an instance snapshot. How to do that, depends on the server company you are using. But that should be pretty straightforward and can be done in a couple of clicks.
- Ghost CLI also provides a
ghost backupcommand, which will include all the site data, including images.
ghost backup . You can just take a backup of your current theme and that should be good. Additional backup options are for the sake of completion.Ensure Consistent Theme Naming
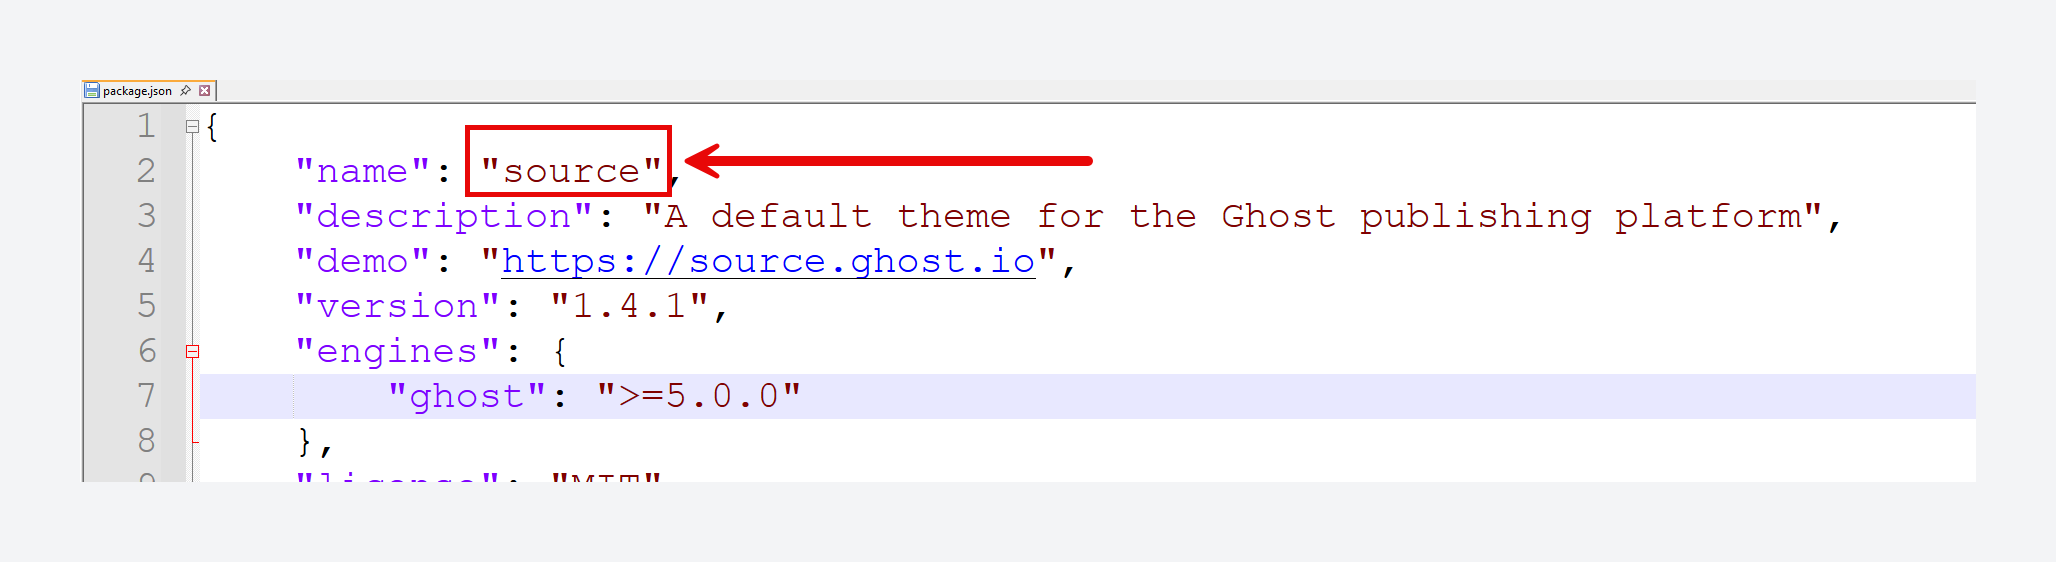
- Ghost relies heavily on the theme's name within the
package.jsonfile and the ZIP filename. Make sure both exactly match the current theme on your website. This consistency is crucial for Ghost to recognize it as an update rather than a new theme.
Why do customizations get lost?
When Ghost finds a mismatch between the theme names (either in the package.json or the ZIP file), it treats the newly uploaded theme as a new theme rather than an update to the existing one.
This resets your custom settings back to default. To avoid this, always keep your theme name the same when updating.
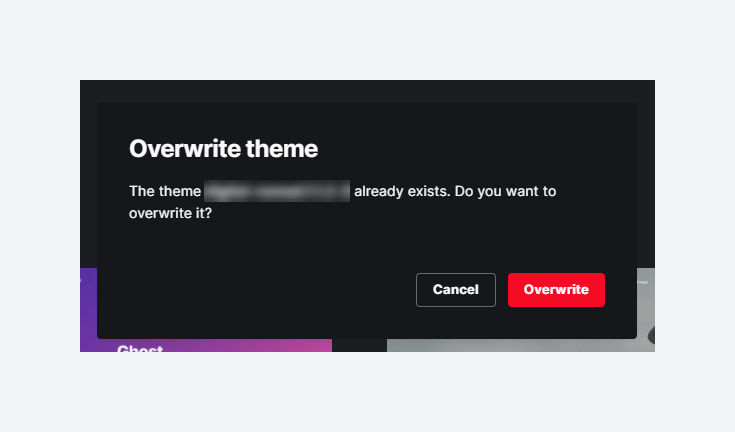
When you have identical theme names, Ghost will prompt that whether you want to overwrite the existing theme or not. If you get that prompt, then you are on the right track.
How to manually update your Customized Ghost Theme
To update your Ghost theme without losing your customisations, follow these steps.
Step 1: Download the Latest Version of Your Theme
- Premium themes: Go to the developer's website to download the most recent version of your theme. Most theme developers either use LemonSqueezy or Gumroad. In that case you can get the latest copy of theme from your LemonSqueezy Orders or Gumroad Library.
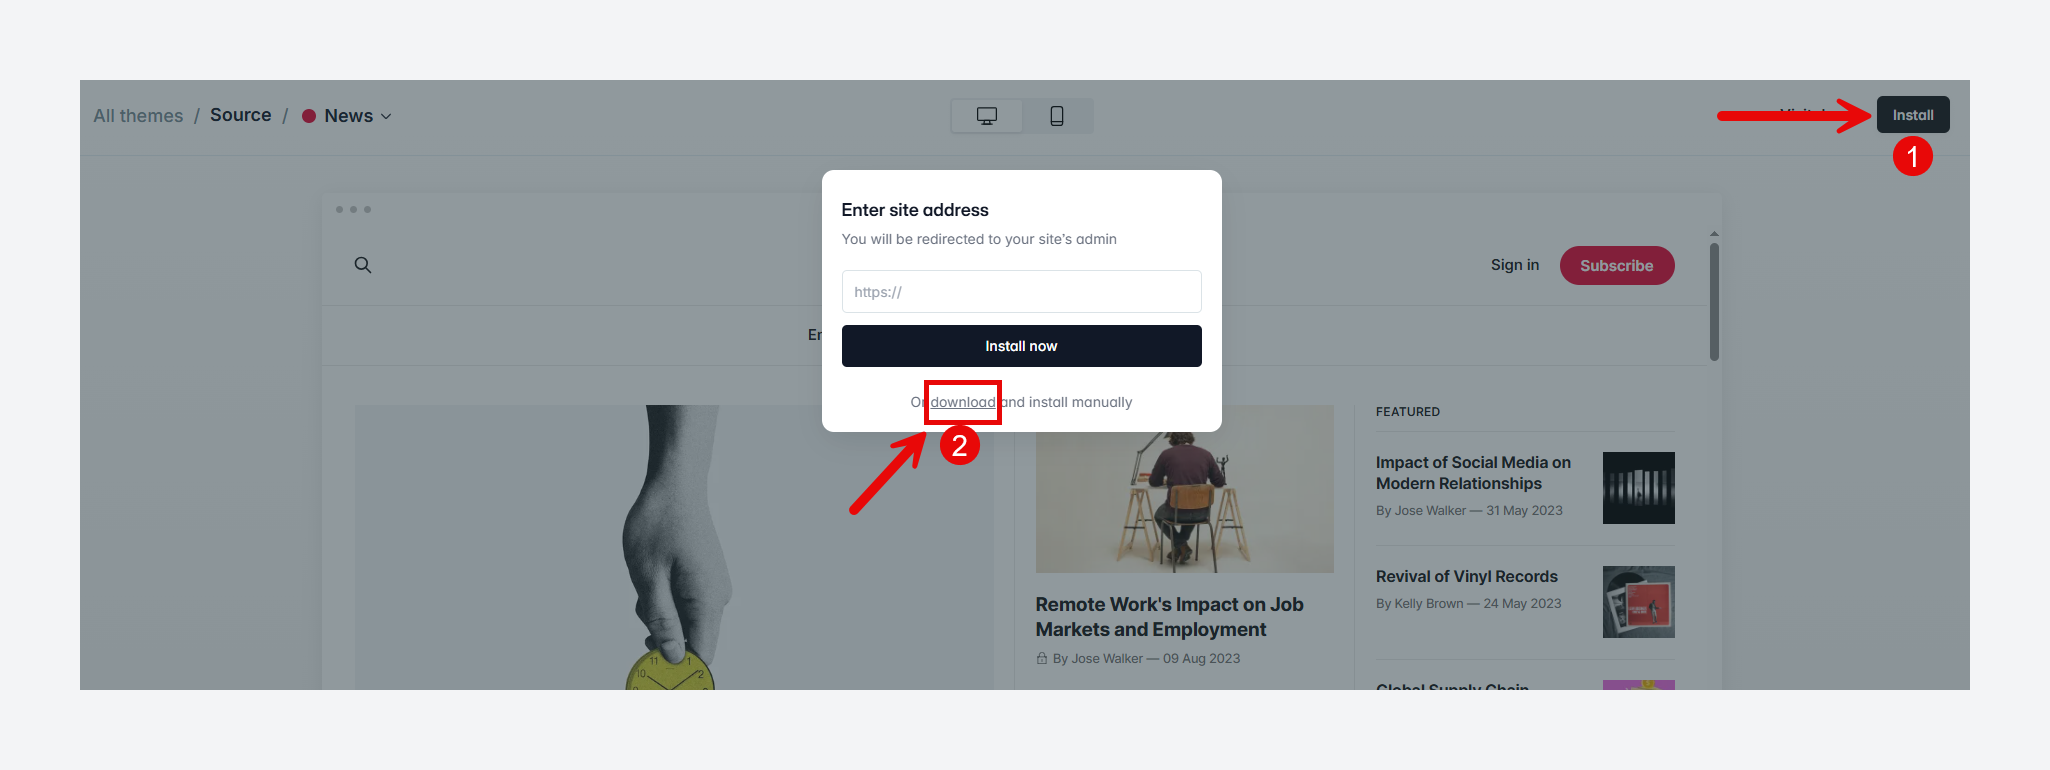
- Official FREE themes: If you are using an official FREE theme, do not directly update it from the Ghost Admin (green button to Update Theme). Doing so will cause your customisations to be lost.
Instead, go to the Ghost Marketplace and find your theme. Then click on Install, and then on the download link. You will have a zip file of the latest version of the theme.
- FREE themes (Github): If you are already using a FREE theme and are comfortable using Github, you can download the latest version of the theme from the repository.
Step 2: Download the current theme from your website
- Go to Settings -> Theme (under Site) -> Change theme -> Installed tab (on top left corner) -> Click the 3-dots of the theme which is active and click Download. This is the same process explained in the Backup Your Current Theme section above. If you followed that, then you already have a copy of your existing theme.
Step 3: Prepare Your Customized Theme for Comparison
- You now have two versions of your theme:
- The new version you downloaded in Step 1. Extract the contents of the zip file into a new directory. Give the directory a name like 'new' to identify it as a new theme.
- The customized version that is currently active on your site, as per Step 2. Similarly, extract this in a directory named 'old' or 'current' to identify it as the current theme.
Step 4: Compare Themes Using Software Tools
Now, you need to check the changes made in the new theme. For this, we need to manually check the files changed, identify the new changes, and avoid overwriting your custom changes.
I must say that this requires some technical knowledge to understand the changes and decide their impact on your customised functionalities.
You need tools to help identify differences between your customized theme and the new version. Three great tools are:
- WinMerge (for Windows users)
- Beyond Compare (Windows, Mac, Linux)
- FileMerge (for Mac users)
The process of identifying and merging new changes are similar in the above tools. I personally use WinMerge. If you are on Mac, you can use Beyond Compare.
Using WinMerge (Windows)

Download WinMerge
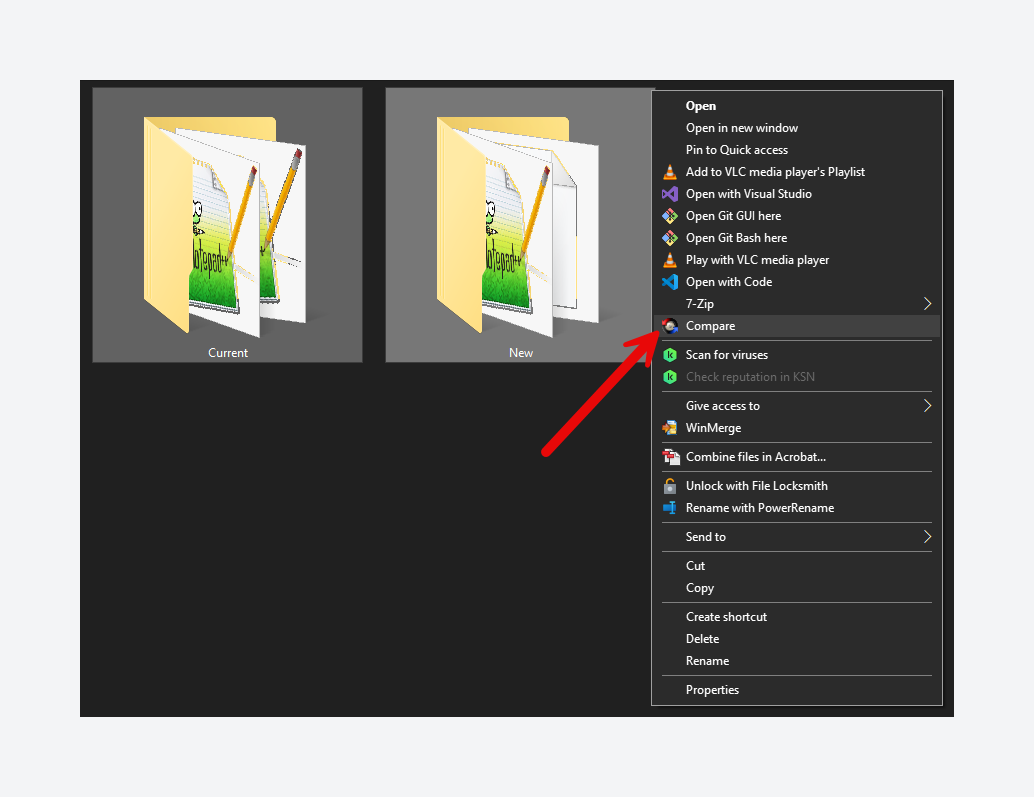
- Install and launch WinMerge and choose File → Open. You can also select the two folders and click 'WinMerge' from the context menu (ensure you enable the context menu during installation).
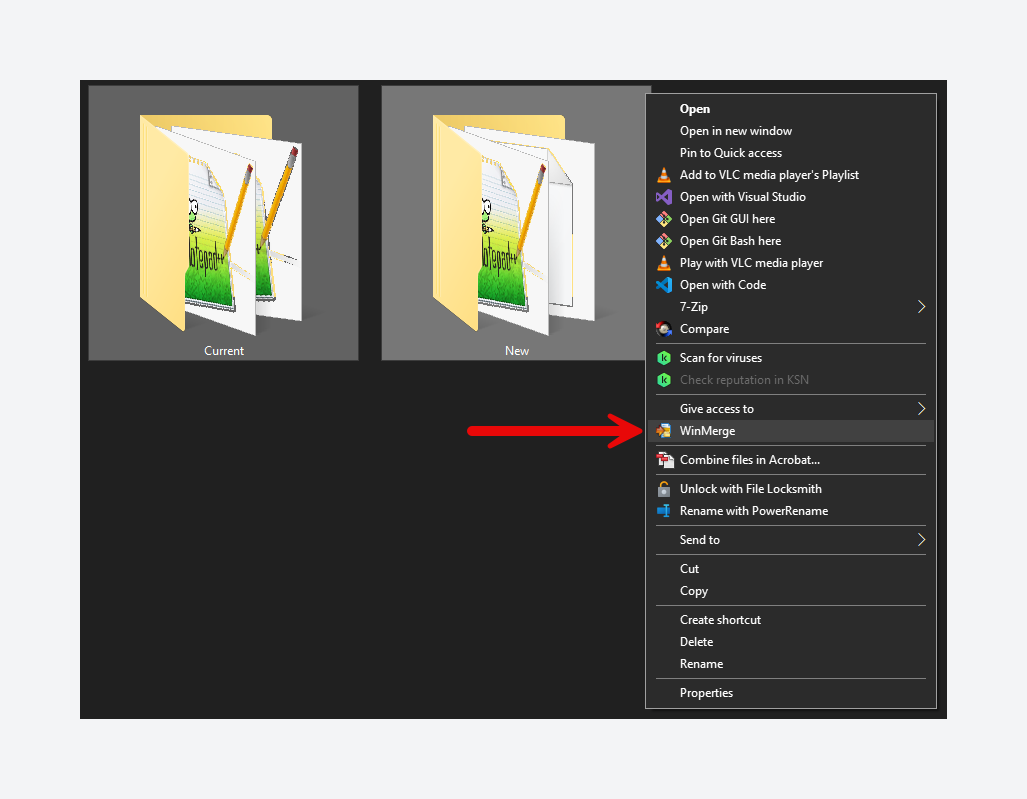
- Select your customized theme folder (left) and the new official theme folder (right).
- WinMerge will highlight:
- Identical Files: No action needed.
- Different Files: Need careful review.
- Left-only: Files unique to your custom theme.
- Right-only: Files new to the latest version of that theme.
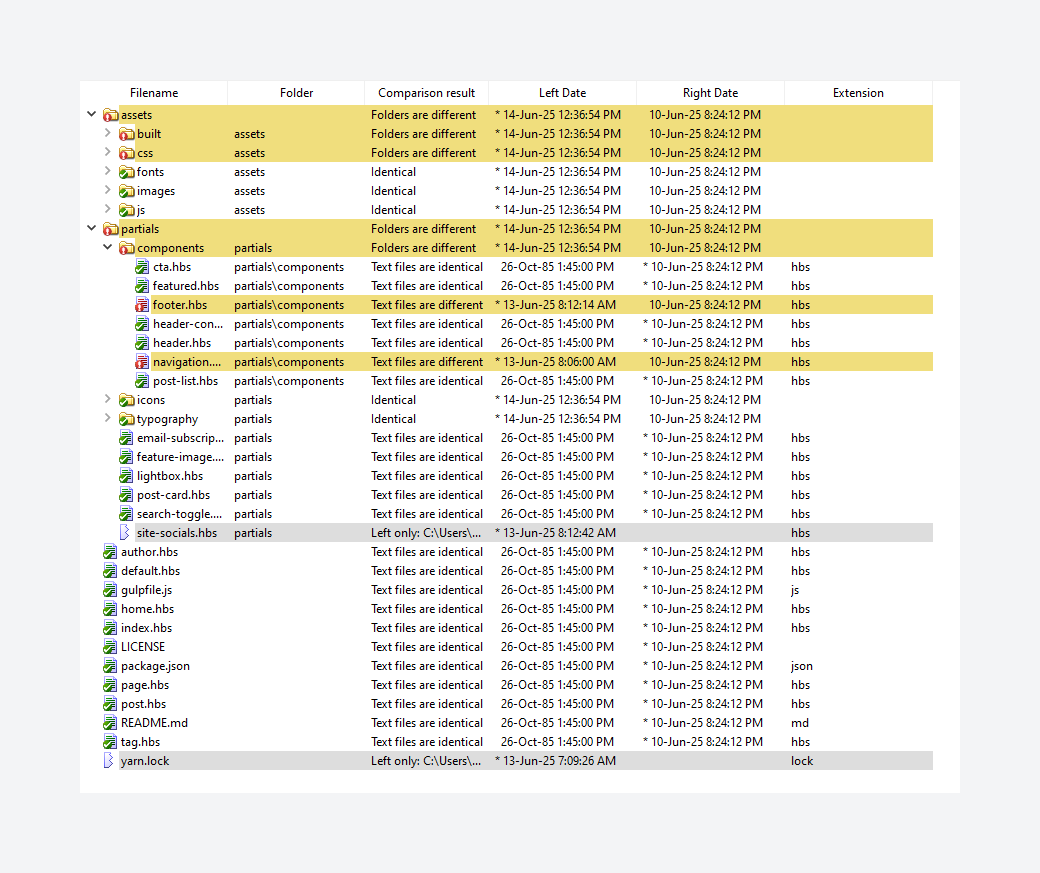
- Review each difference carefully:
- If changes exist only in the new official theme, accept these.
- If you have customizations that conflict with new changes, carefully merge manually.
Using Beyond Compare (Windows, Mac, Linux)

Download Beyond Compare
- Beyond Compare offers an intuitive visual interface to compare folders and files:
- Open Beyond Compare and select "Folder Compare." Similar to WinMerge, you can also compare two folders using the context menu.
- Select your customized theme folder and the new official theme folder.
- Files and folders will be color-coded:
- Identical: Usually greyed out, indicating no differences.
- Differences: Clearly highlighted.
- Left-only or Right-only: Files unique to either your customized or official theme.
- Double-click to see side-by-side differences within files.
- Carefully merge changes using the built-in editor, ensuring your customizations remain intact.
Using FileMerge (Mac)
- FileMerge is part of Xcode.
How to use FileMerge to compare files on Mac OS
- Open FileMerge and select your customized and new theme directories for comparison.
- Similar to WinMerge and Beyond Compare, review and merge differences cautiously.
Step 5: Create and Upload Your Updated Theme ZIP
- After merging changes:
- Double-check the
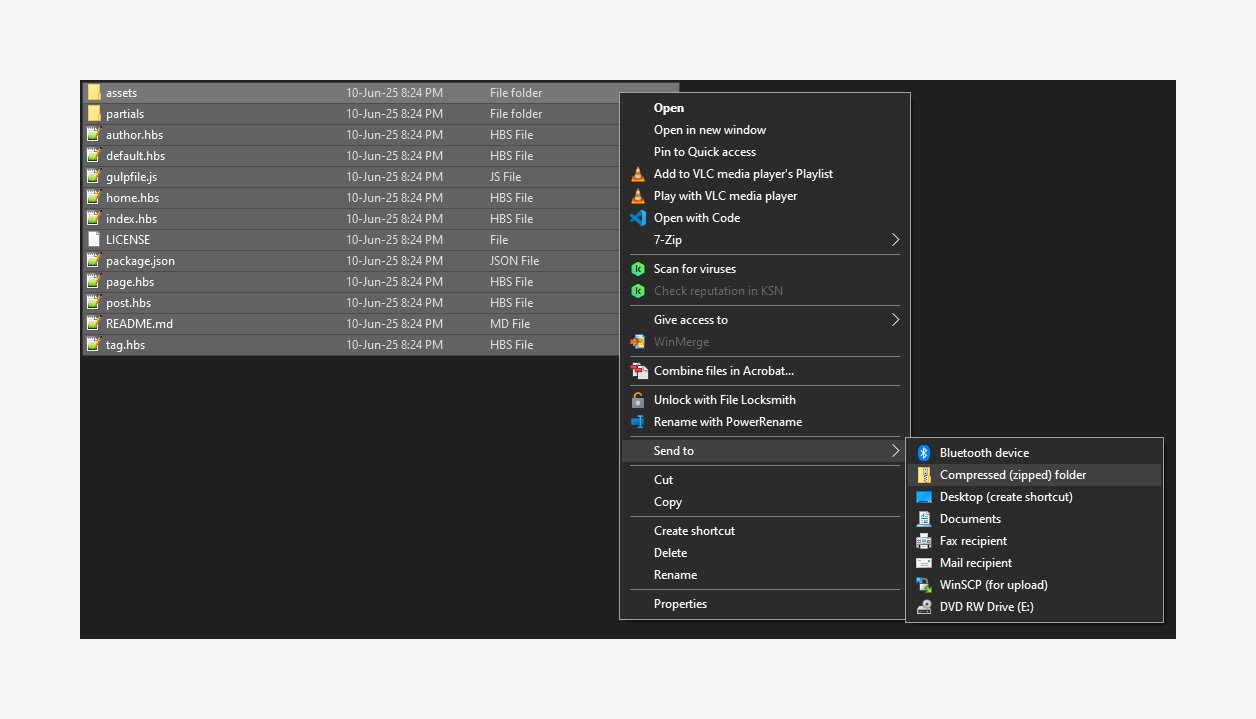
package.jsonto ensure the theme name matches your existing theme exactly. - Zip the folder, ensuring the ZIP file name matches exactly your existing theme's zip file.
- Double-check the
- Upload this ZIP via Ghost Admin (Settings → Theme → Change theme → Upload theme).
- Confirm to overwrite when prompted by Ghost.
Common Issues and Troubleshooting
Sometimes things don't go as smoothly. Here are solutions to common issues you might face.
Lost Custom Design Settings
- Ensure the ZIP filename and
package.jsontheme names match. - Reactivate your original theme, recover settings, then correctly re-upload the new theme.
Theme Upload Fails
- Check if the ZIP file is corrupted or improperly zipped. Re-zip properly and try again.
- Ensure there's no extra folder nesting inside your ZIP. Ideally, if you unzip your theme file, all the theme files (.hbs, partials directory, package.json, etc.) should be at the root and not nested inside any other directory.
Errors After Updating the Theme
- This often occurs due to merge errors. Recheck with WinMerge, Beyond Compare, or FileMerge carefully.
- Ensure custom code doesn't conflict with new theme files.
Best Practices to Avoid Issues
Use Code Injection
Ghost provides a built-in "Code Injection" feature (Settings → Code Injection) for minor CSS/JavaScript tweaks, ensuring they won't get overwritten during theme updates.

If you want to make minor changes, I highly suggest using Code Injection rather than updating the theme files.
Regular Backups
Regularly back up your customized themes to quickly revert if needed.
Comments while customising
It is a good practice to add comments when making any new changes to the original copy of your theme. This will help you identify what these changes are for and help you easily update your theme. So, next time you add any custom code, don't forget to add your comments.
Key Takeaways
- Always match the theme name in your ZIP and package.json.
- Backup. Backup. Backup before updating.
- Use comparison tools (WinMerge, Beyond Compare, FileMerge) for precise merging.
- Leverage Code Injection for small customizations.
Updating your customized Ghost theme doesn't have to be stressful. Following these clear, manageable steps, you can confidently update your theme without fearing losing your customizations.


Start your publishing journey effortlessly with Ghost(Pro), the hassle-free, fully-managed hosting. Click the button below to get started!
-
0% Transaction fees
-
Custom domain
-
Fully managed service
-
Automatic weekly updates
-
Worldwide CDN
-
Enterprise-grade security
-
Threat & uptime management
-
Migration from current CMS
(For Yearly billing) Disclaimer: This CTA may contain affiliate links. We may earn a commission at no cost to you. Not sponsored or endorsed by Ghost.org, the Ghost Foundation, or any third-party developer or agency. Features, pricing subject to change without notice.